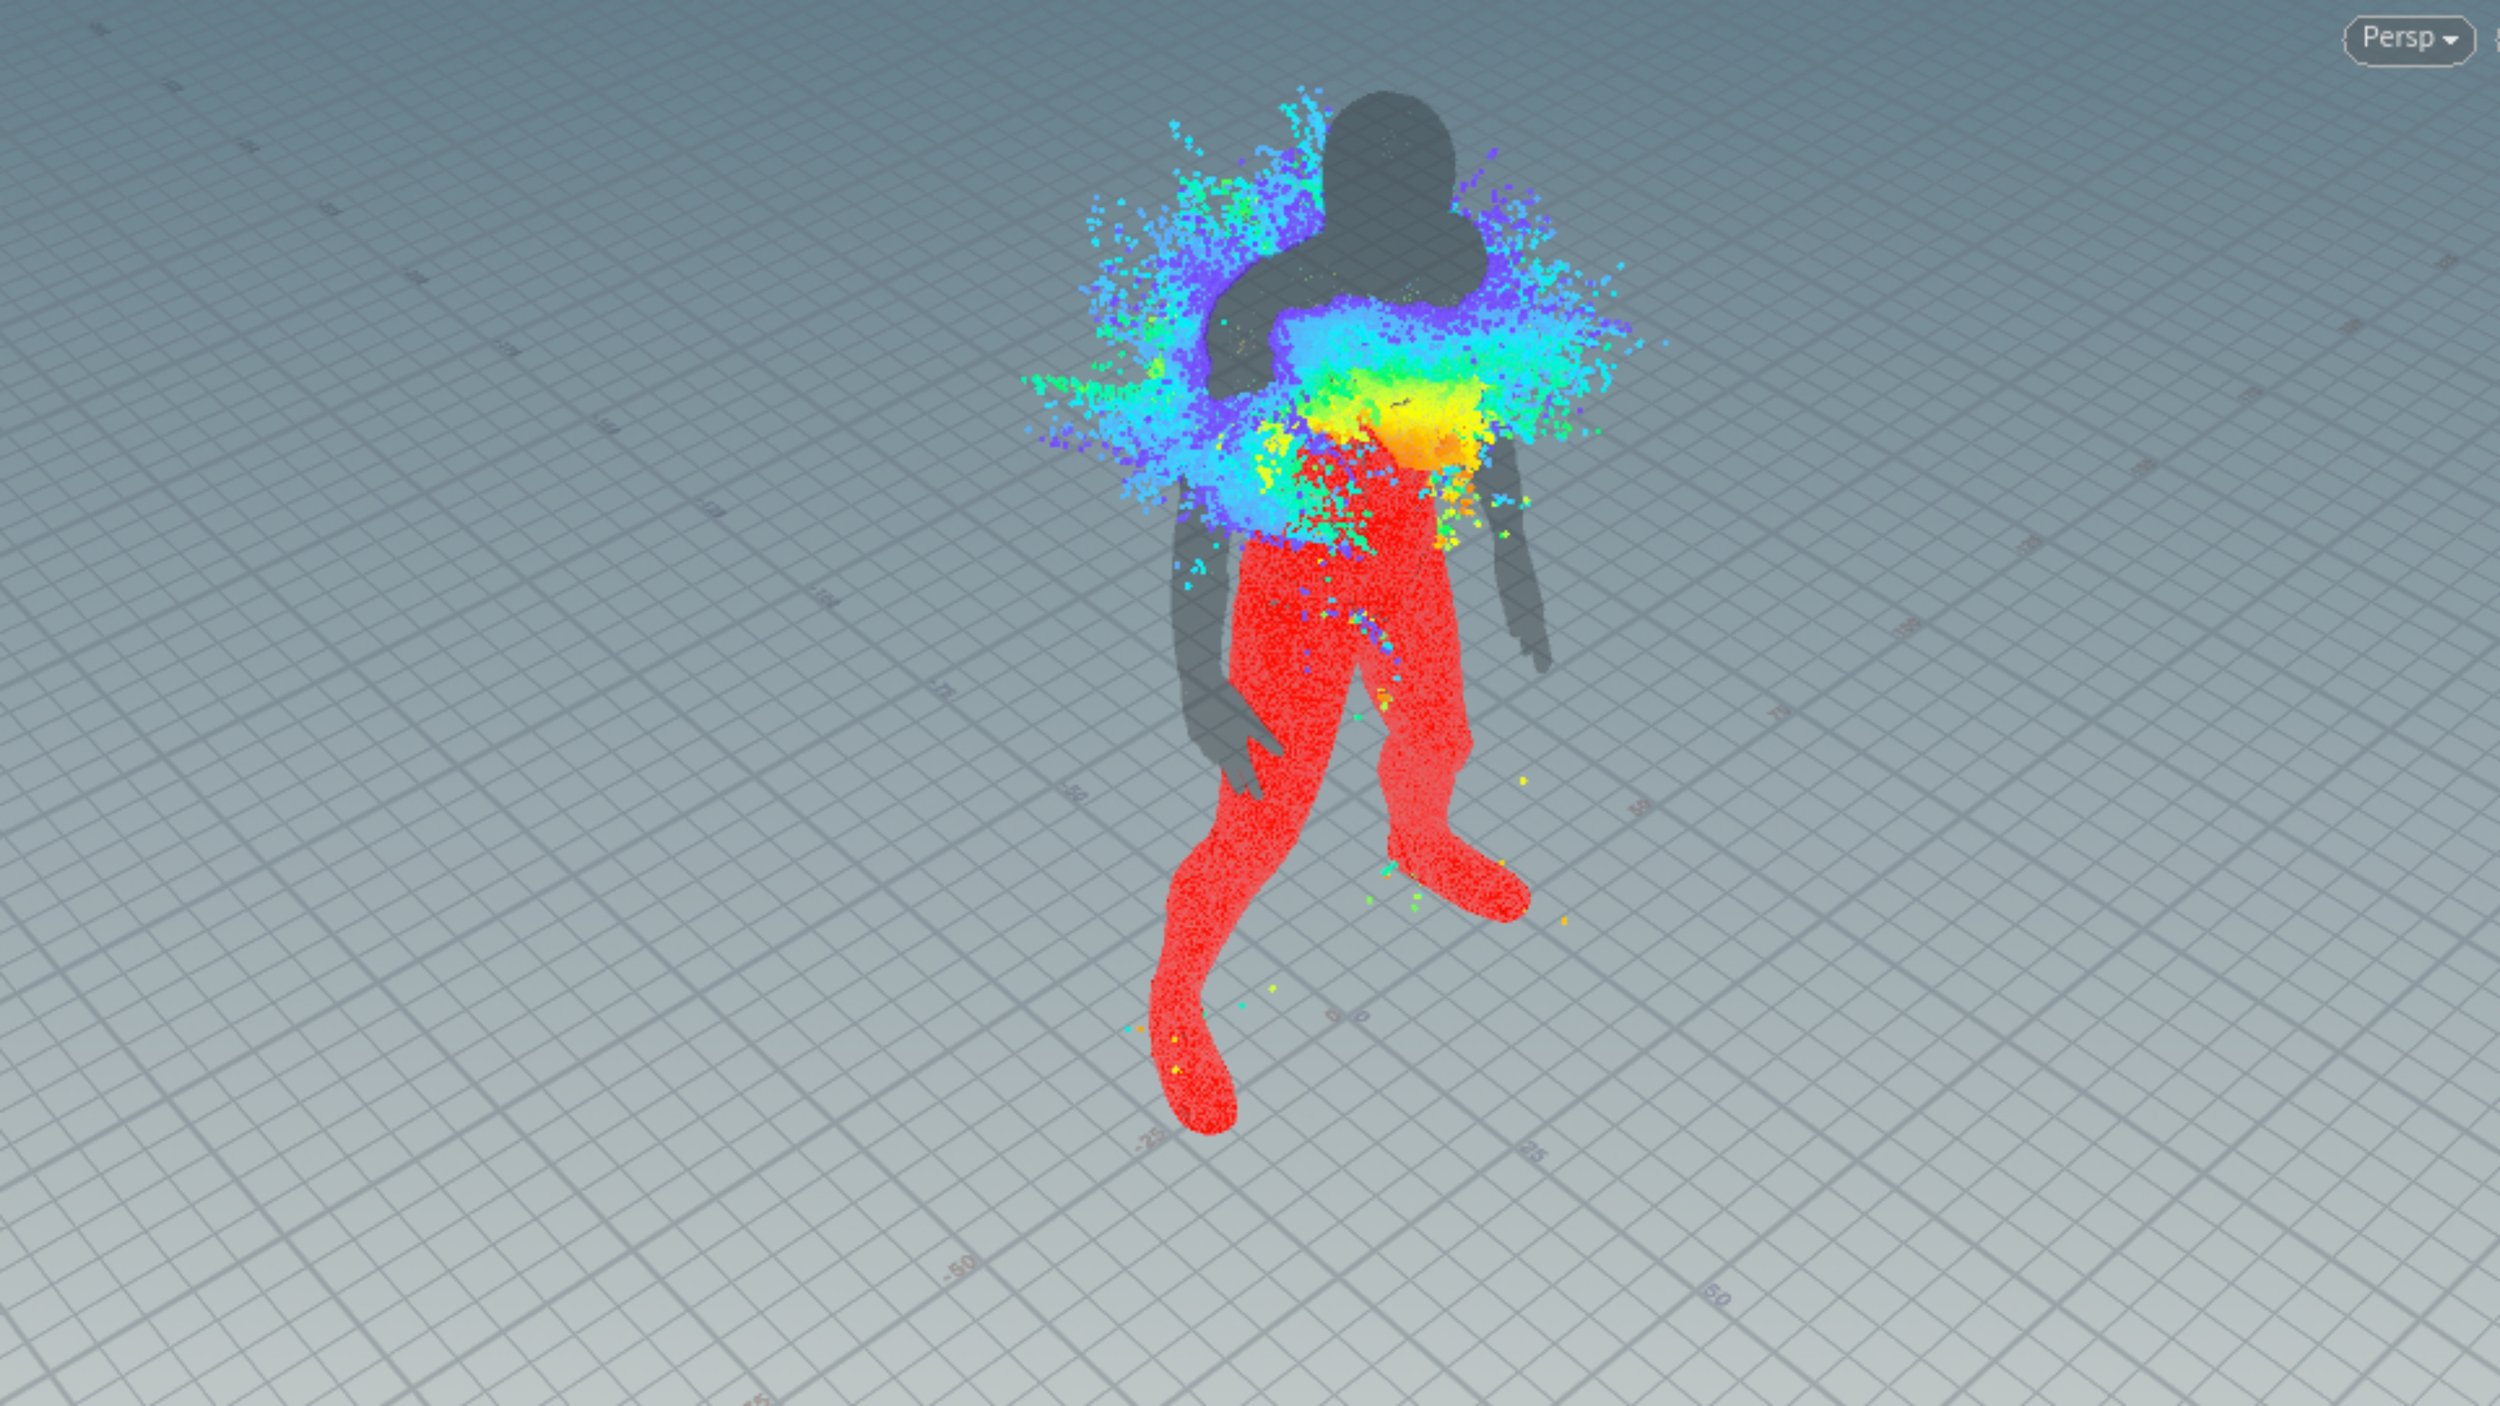
Particle Simulation
The model and animation of the character was provided by other sources. I initially converted the mesh into points before applying a temperature attribute. I used this attribute to control the influence of the ‘‘Pyro Source Spread" SOP. I used VEX to refine the growth of the attribute (represented in red) and its ramp values to dictate the areas I wanted to spread/disperse the points into a noise movement. This would later be used…


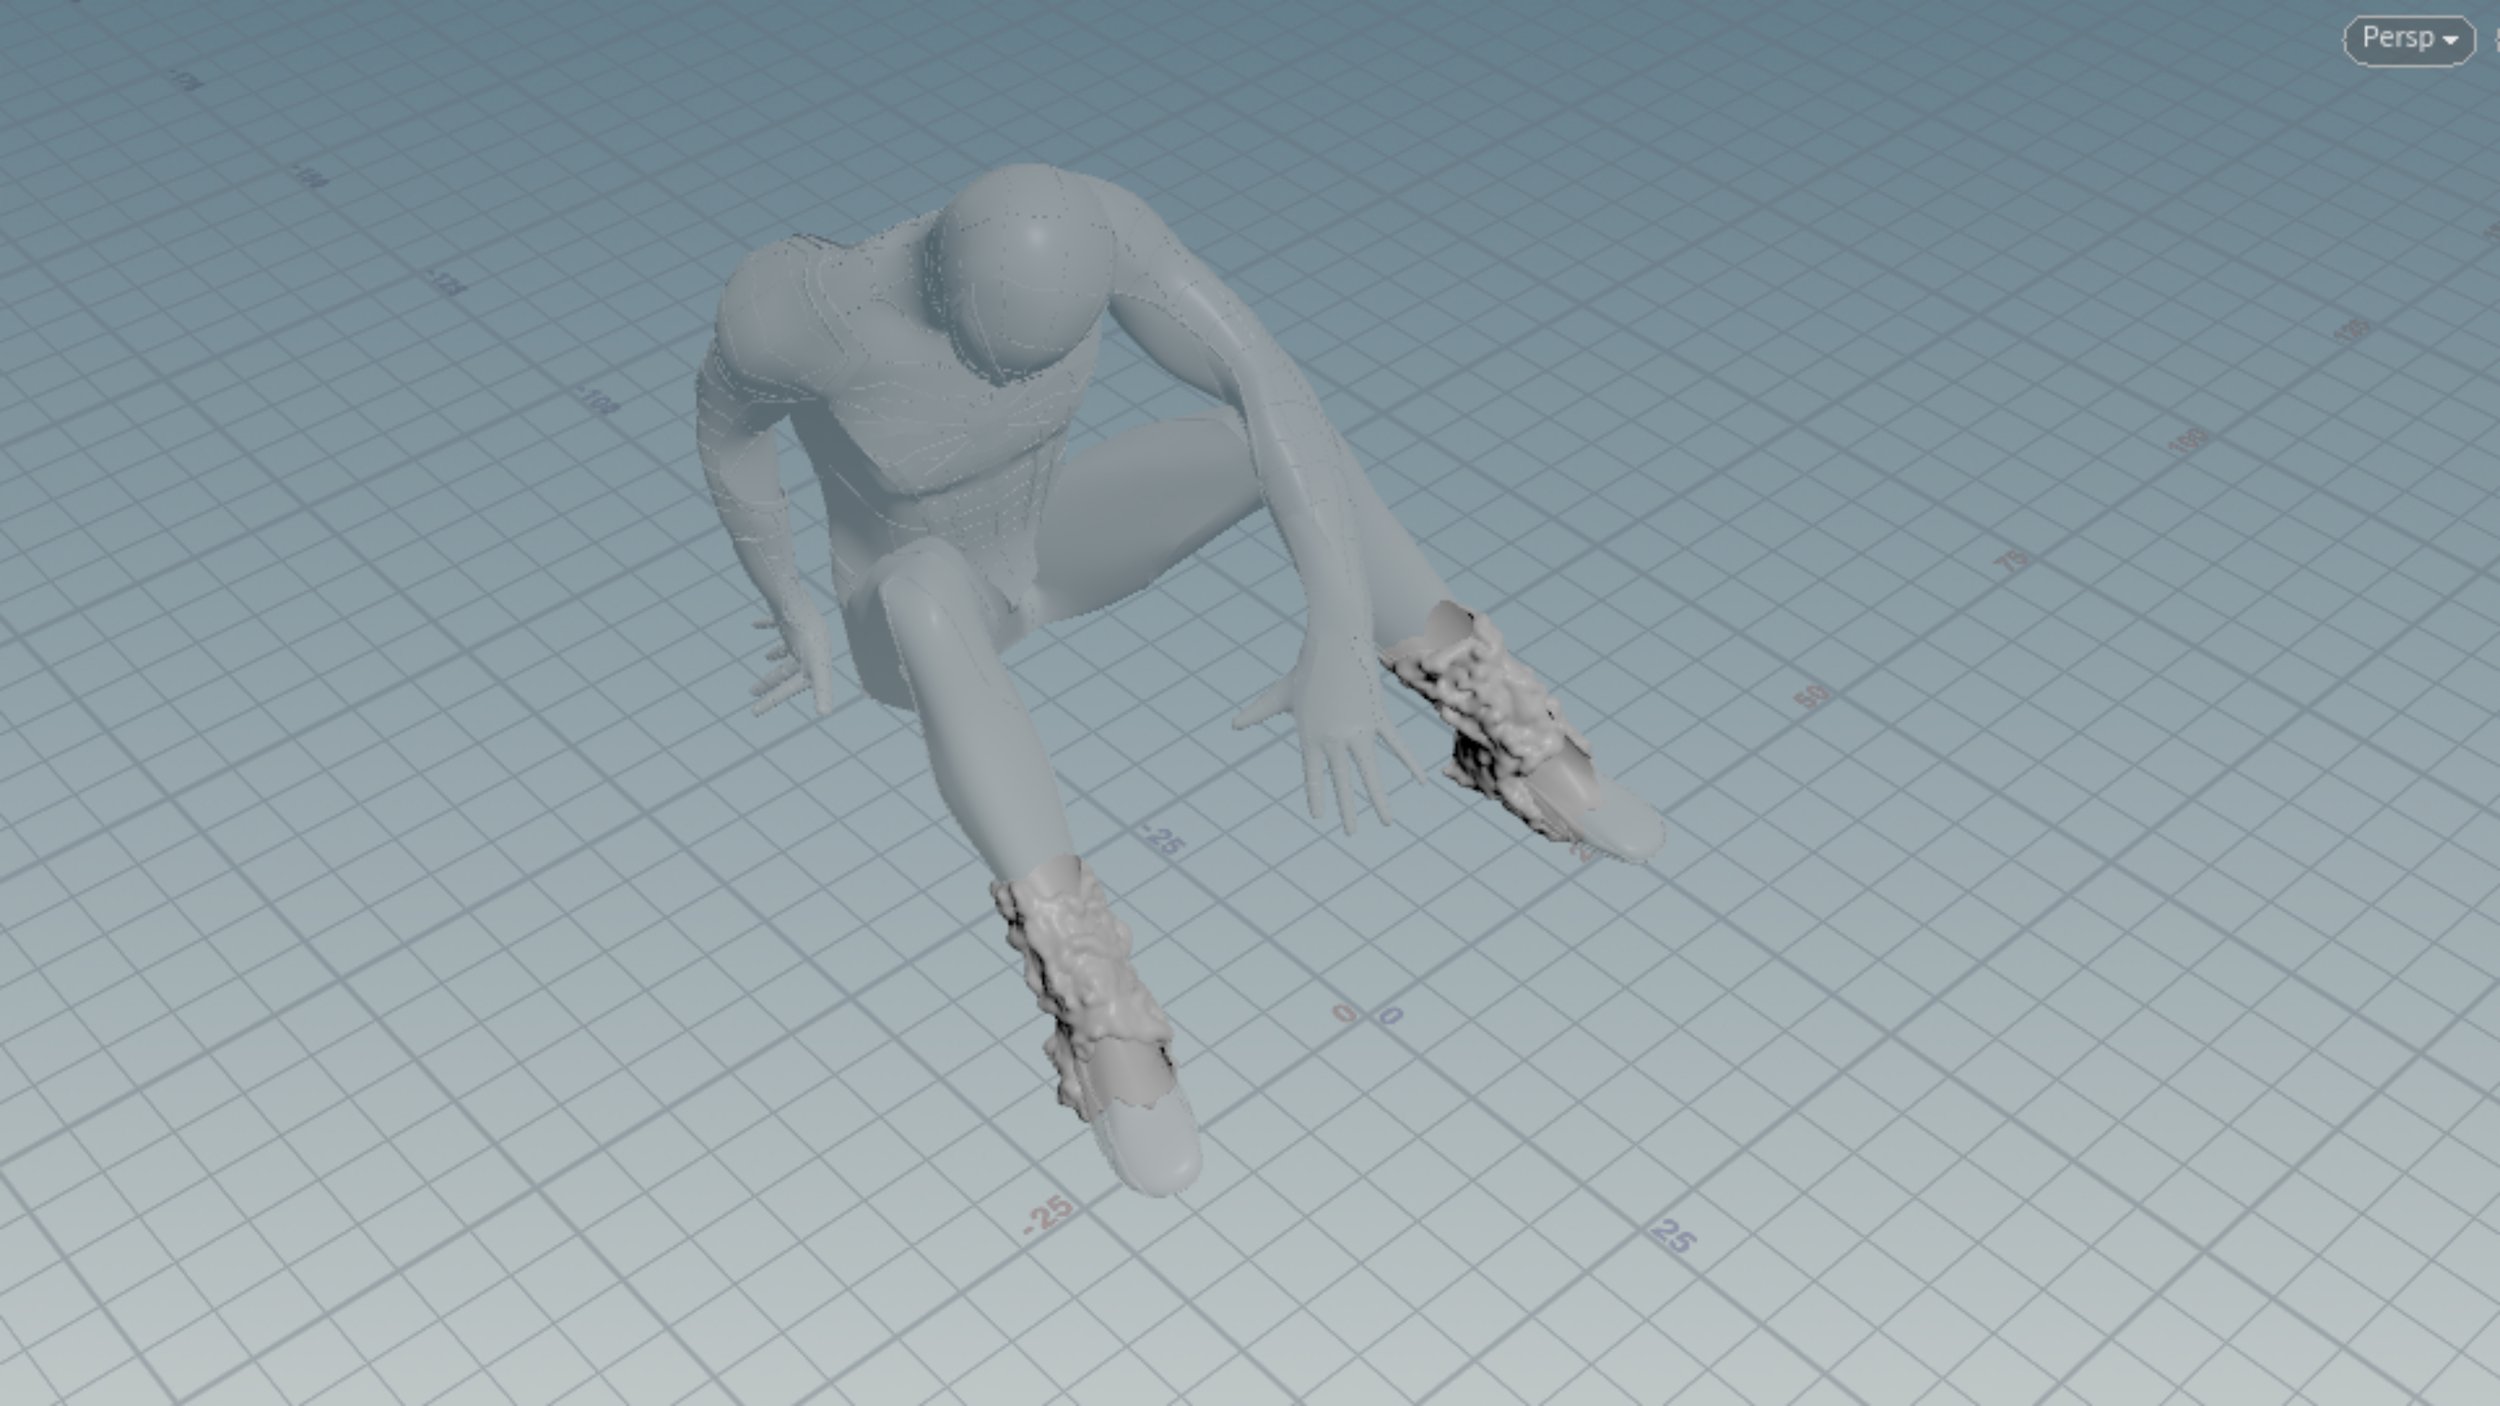
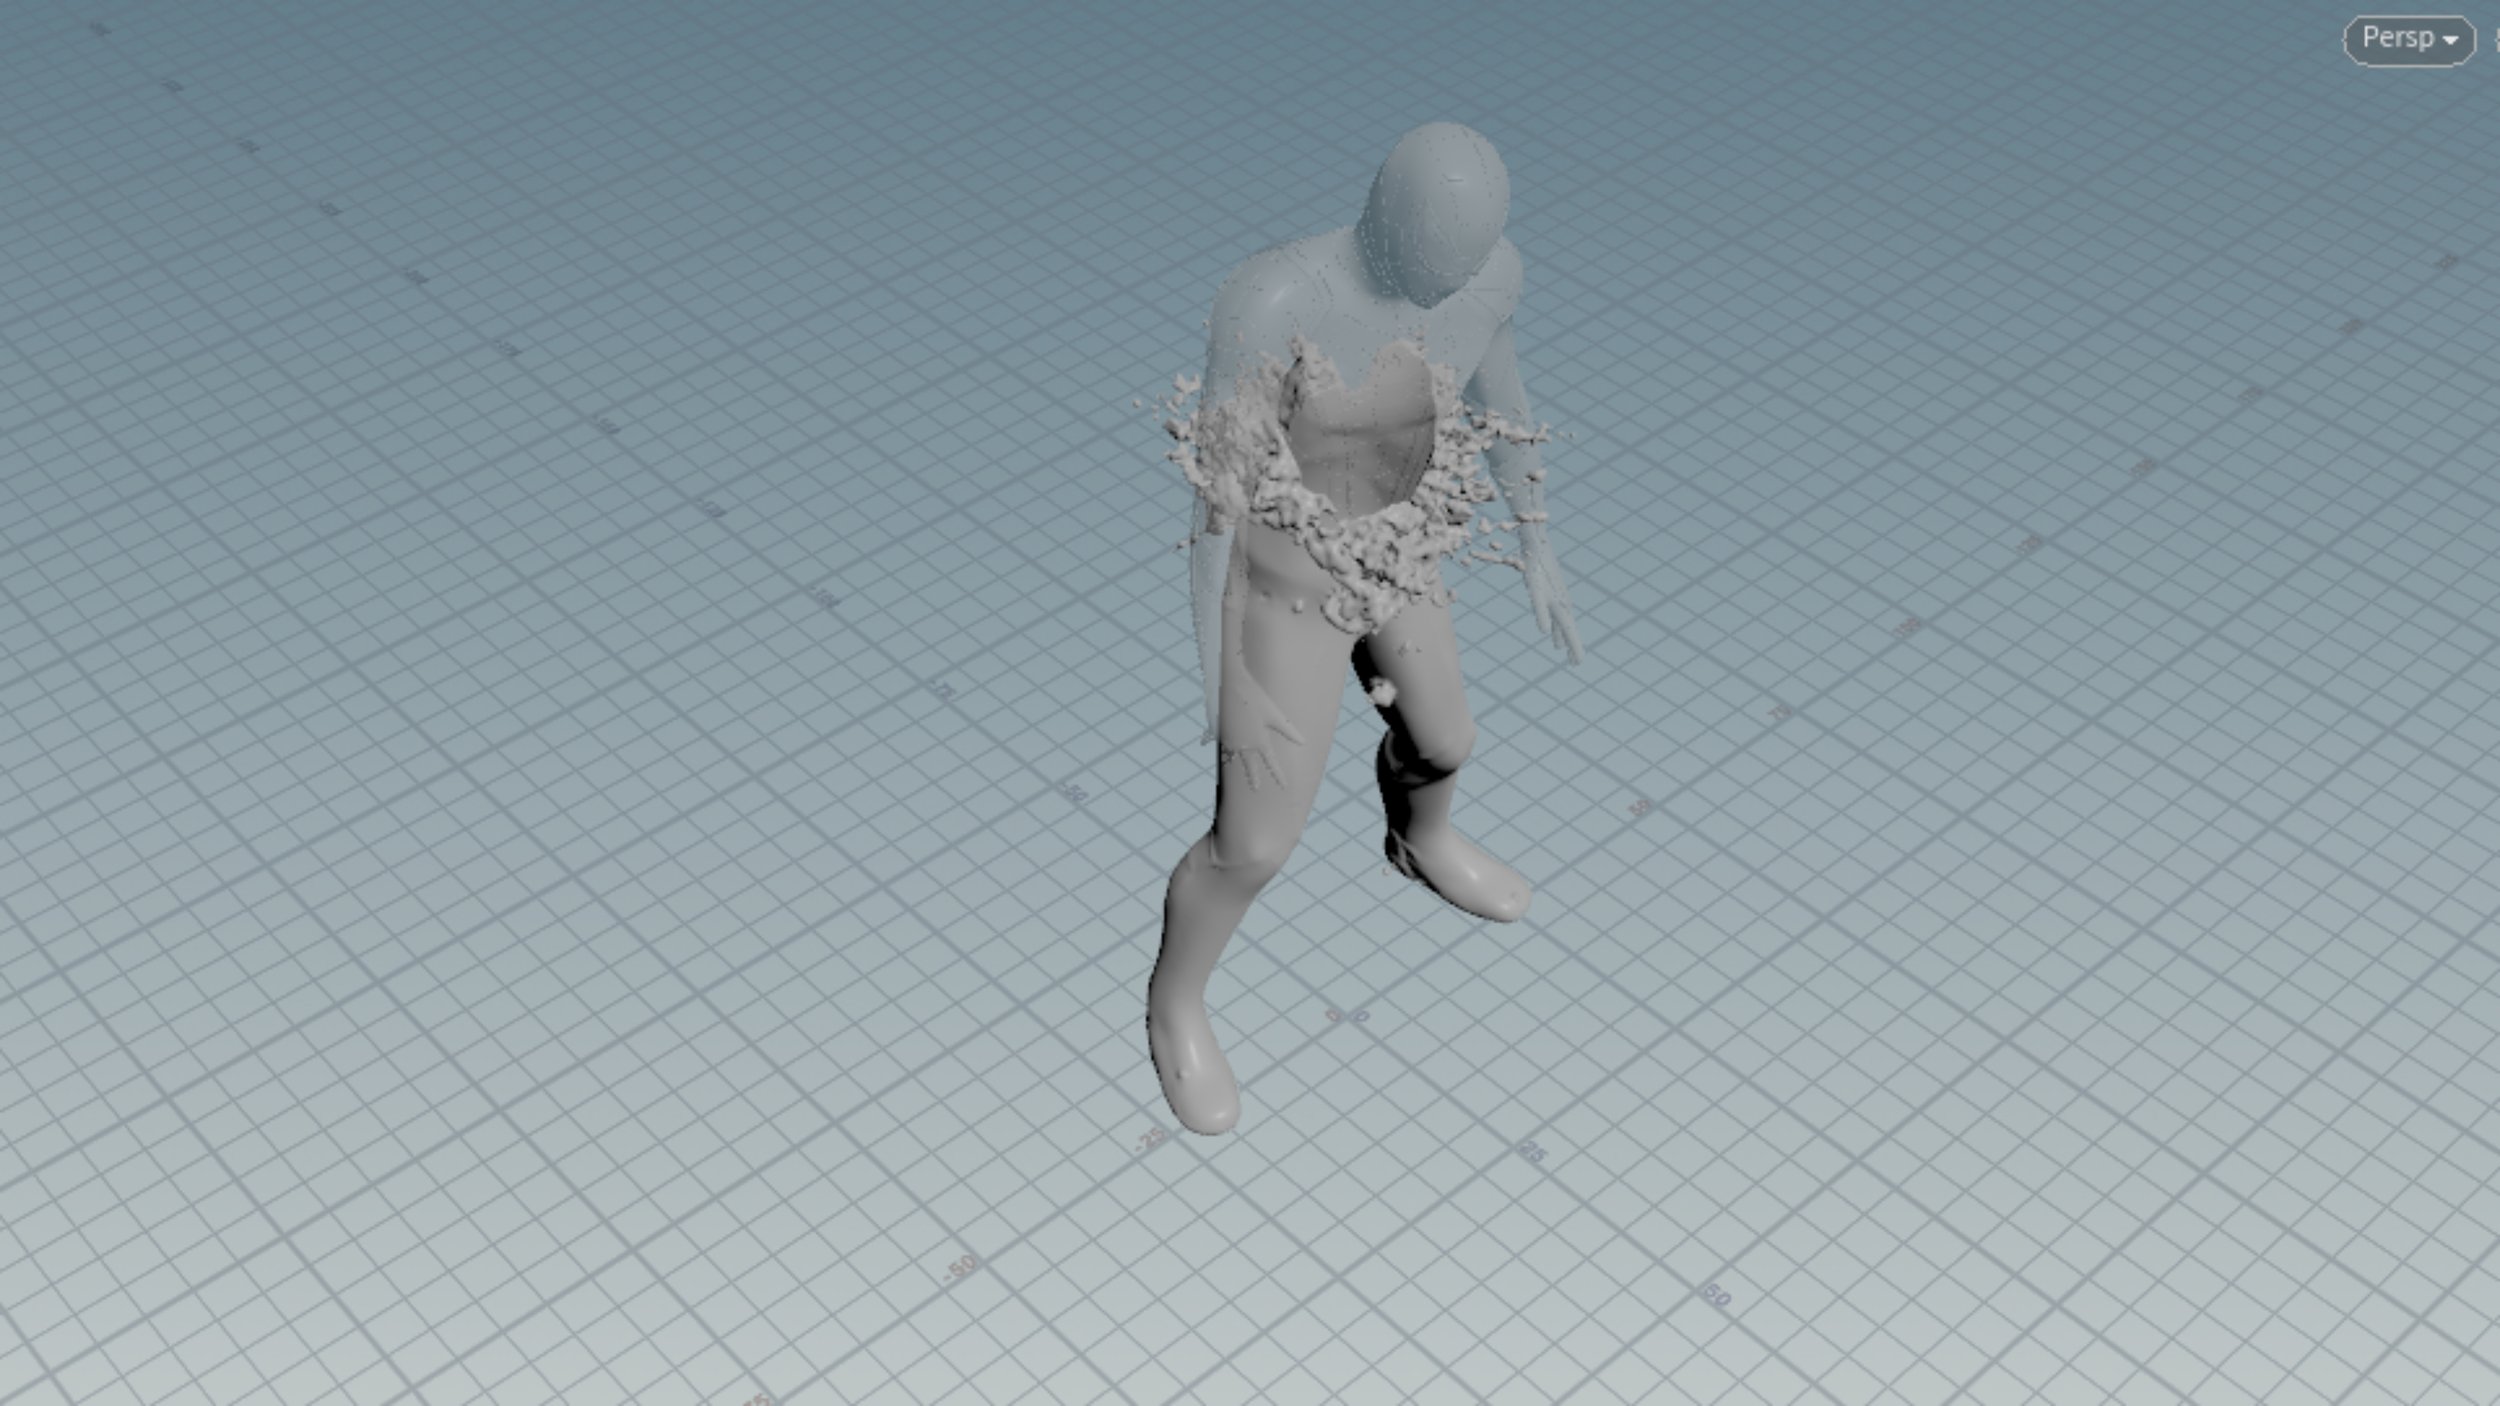
Meshing from VDB SDF
…to convert the points into a vdb using a “VDB from Particles " SOP. I made refinements to the shape using volumes until I was satisfied with the shape of the mesh. I converted it into a primitive mesh and cached the simulation throughout the process.


Symbol and Eye Animation
I used Substance Painter to create the symbol on the character before exporting as a black and white mask to be used along with the “Attribute from Map” SOP in Houdini. I cleaned the design using the “Paint Attribute” SOP before using the attributes to extrude and shape the symbol. I used a “Pyro Source Spread” again to animate an attribute for the symbol growth. I set this all before reattaching to the rig to move with the animation of the character.
The eyes were just deformed using an “Attribute Noise“.


COP Network for Symbiote Texture
I used Houdini’s Copernicus network to add just a little variation to the texture of the suit. This would be saved out as a normal/displacement map for Unreal Engine to apply to the material.


Unreal Engine 5.5 Composite
From here, I exported all the geometry assets as an alembic file and imported it as a geometry cache alembic file in Unreal Engine 5. I incorporated a scene in my library called ‘Stylized winter city environment’ by JessyStorm. I made several materials to shade the eyes, black suit, regular suit and other objects that came with the alembic import. From here, I just set up a render sequence to create the composition of the shot and used a Post Process actor to adjust the aesthetic.


